Introduction
Why the front split takes time — and how anyone can improve it safely
The front split is more than “being flexible.” It’s a mix of joint structure, muscle length, tendon and fascia compliance, nervous-system tolerance, and simple strength in end ranges. That’s why progress can feel slow: connective tissue adapts slowly (weeks → months), and your nervous system protects you from going too far too fast.
The good news: nearly everyone can improve their front split with the right approach — consistent, progressive practice that balances safe stretching, active strength, good warm-ups, and recovery. The fastest way to stall or get injured is to chase depth with passive forcing. Instead, prioritisation pain-free, pain-aware progression, build control in the end range, and give tissues time to adapt.
Understanding the Front Split
What muscles are involved (hip flexors, hamstrings, glutes, adductors)
- Hip flexors (psoas, rectus femoris): limit extension of the rear leg; often tight from sitting.
- Hamstrings: limit forward leg extension — key for the front leg.
- Glutes (especially gluteus maximus/medius): help control pelvic position and hip rotation. Weakness or tightness changes alignment.
- Adductors (inner thighs): influence how open the hips can get and control lateral alignment.
- Calves, quads, and lower-back muscles play secondary roles in alignment and comfort.
Mobility vs. flexibility: what actually limits your split
- Flexibility (passive range): how far a muscle/soft tissue can be lengthened when something else moves you into the position.
- Mobility (active control + joint health): your ability to actively control and move into that range with strength, coordination, and joint freedom.
Usually the limiter is a combination: one side might be passive-limited (soft tissues), while the other is active-limited (you can’t control or hold the position). Also consider joint structure (hip socket shape) — some anatomical differences affect the ultimate end range but rarely prevent large improvements.
Common misconceptions about “naturally flexible” people
- “They were born that way.” Biology helps, but most flexibility is trained.
- “They don’t have to work for it.” In many cases they practice more, use active control, and warm up effectively.
- “Stretching alone will fix it.” Without strength, control, and progressive load, gains are fragile and more likely to regress or cause injury.
Assessing Your Starting Point
Simple front split mobility tests
- Seated forward reach (both legs in front): sit tall, legs straight — reach toward toes. Measure how close your chest is to knees or how far you reach.
- Half split (Ardha Hanumanasana) test: from kneeling, slide one leg forward and fold over front leg. Note hamstring tightness and pelvic tilt.
- Kneeling lunge (rear leg straight/arched): step into a deep lunge, tuck pelvis, then try to extend the rear hip. See where the stretch is strongest.
- Active straight leg raise (ASLR): lie on back, actively lift one straight leg as high as possible. Compare active vs passive heights.
Record whichever side is tighter and how much difference there is between sides (a few centimeters or more).
Identifying your tight side and asymmetries
- Perform the same test on both sides back-to-back. If one side consistently reaches less, that’s your tight/limiting side.
- Look for compensations: pelvis rotation, torso leaning, knee bend in the front leg — these show where alignment needs work.
Knowing whether strength or range of motion is your main limiter
- Passive > Active: if someone passively brings your leg into the split farther than you can actively hold it, you’re likely strength/active control limited. Add end-range strength work.
- Active ≥ Passive: if you can actively lift but can’t be taken further passively, you’re more tissue-length limited and need progressive stretching and neuromuscular desensitization.
- Pain or sharp sensations: don’t push. Pain suggests an issue (tendon, nerve, joint). Back off and consider a professional assessment.
Preparing Your Body for Front Split Training
Why warm-ups matter for deep flexibility
Warm-ups increase muscle temperature, improve tissue extensibility, and prime the nervous system for movement — reducing injury risk and letting you access deeper, safer ranges during your practice.
Quick 6–8 minute warm-up routine (do this before split work)
- Light cardio (1–2 min): brisk march or jump rope to raise body temp.
- Leg swings front-to-back: 10–12 each leg (start small, then increase range).
- Lateral leg swings: 8–10 each leg to open adductors.
- Walking lunges with overhead reach: 8–10 steps each side — opens hip flexors and mobilizes the thorax.
- World’s Greatest Stretch: 6 reps each side (lunge, torso twist, hamstring reach).
- Glute bridges: 10–15 reps to activate posterior chain.
- Light half-splits: slide into a half-split, hold for 20–30 sec each side—use this to test readiness.
Dynamic movements to open hips and legs
- Hip CARs (controlled articular rotations): slow, small-to-large circles at the hip to explore range without stretching forcefully.
- High-knee marching with hamstring reach: active control and dynamic lengthening.
- Cossack squats (shallow to start): lateral mobility for adductors.
- Slow eccentric step-downs: improve control and prepare tendon loads (use a small step).
Breathing techniques to reduce tension
- Diaphragmatic breathing: inhale through nose filling lower ribs/abdomen; exhale long and slow. This calms the nervous system and reduces guarding.
- Exhale-to-sink cue: on each exhale, gently relax and allow 1–2 mm more depth (no forcing).
- 4–6 second exhale pattern: inhale ~3 sec, exhale ~5–6 sec to promote relaxation in the tissues.
- For PNF-style holds, inhale to prepare, contract on a short exhale, then inhale and relax deeper on the next exhale.
Step-by-Step Front Split Progression
Below I’ll take you through the practical, coaching-style steps from basic mobility to a controlled full split. For each drill I’ll include purpose, cuing, and simple sets/reps so you can put this straight into a session.
Step 1 — Building Basic Hip & Hamstring Mobility
Goal: Create safer, usable range in the key tissues (hip flexors, hamstrings, adductors).
Drills & how to use them
- Kneeling hip flexor + tilt — Purpose: lengthen front of rear hip while teaching pelvic tuck.
How: from lunge, tuck pelvis, squeeze glute of rear leg, hold 30–40s. 2–3 sets each side.
Cue: “Posteriorly tilt the pelvis, feel the front hip soften.” - Half split (active emphasis) — Purpose: hamstring length without passive collapse.
How: from kneeling, slide front leg forward, keep hips square and back flat, reach chest toward thigh; hold 20–40s. 2–3 sets each side.
Cue: “Pull toes back, chest long, don’t round the lower back.” - Standing or supine banded hamstring distraction — Purpose: gently distract the hamstring to increase tolerance. 20–30s holds, 2–3 reps per leg.
- Cossack lateral slides — Purpose: adductor mobility and hip opening. 6–8 slow reps each side.
Progression rule: once 20–30s holds feel easy and you can maintain neutral pelvis, increase range or add 10–20% duration.
Step 2 — Strength in End Ranges
Goal: Develop active control where you want to be — prevents collapsing and protects tissues.
Exercises & prescriptions
- Active straight leg raises (with band or wall support) — 3 sets × 6–10 reps, slow (2s up, 2s down). Builds active hamstring/hip flexor control for the front leg.
- Rear-leg isometric holds (half split position, push back into a prop) — 3 × 10–20s. Push gently against a block with the back knee/foot to create isometric tension through the hip flexors.
- Eccentric-loaded split slides — slowly slide into a deeper half-split (use towels on floor), 3 × 5 slow controlled reps. Focus on resisting with the hamstrings of the front leg.
- Single-leg Romanian deadlifts / single-leg RDLs — 3 × 6–8 each side to build posterior chain control.
Isometric use: contract against the stretch for 5–10s then relax and sink deeper on the exhale (PNF-style). This protects tendons and teaches the nervous system to accept more length under load.
Step 3 — Assisted Front Split Variations
Goal: Safely increase depth while maintaining alignment.
Props & methods
- Yoga blocks or stacked books: place under hands or hips to control depth. Lower blocks gradually as you improve.
- Cushion under back thigh: reduces load on hamstring and helps work toward full range.
- Straps around hips (or loop band): use for gentle assistance to maintain neutral pelvis as you descent.
How to practice
- Supported half-split to block holds: 3–5 × 30–60s, using blocks at a height where you can keep hips square.
- Assisted sliding split (use towel or glider): 3–5 slow slides into the split with a controlled 3s descent and 3s ascent.
Alignment cues
- Square the hips to the front.
- Keep front knee straight but not locked.
- Tuck the pelvis slightly to avoid anterior pelvic tilt and lumbar compression.
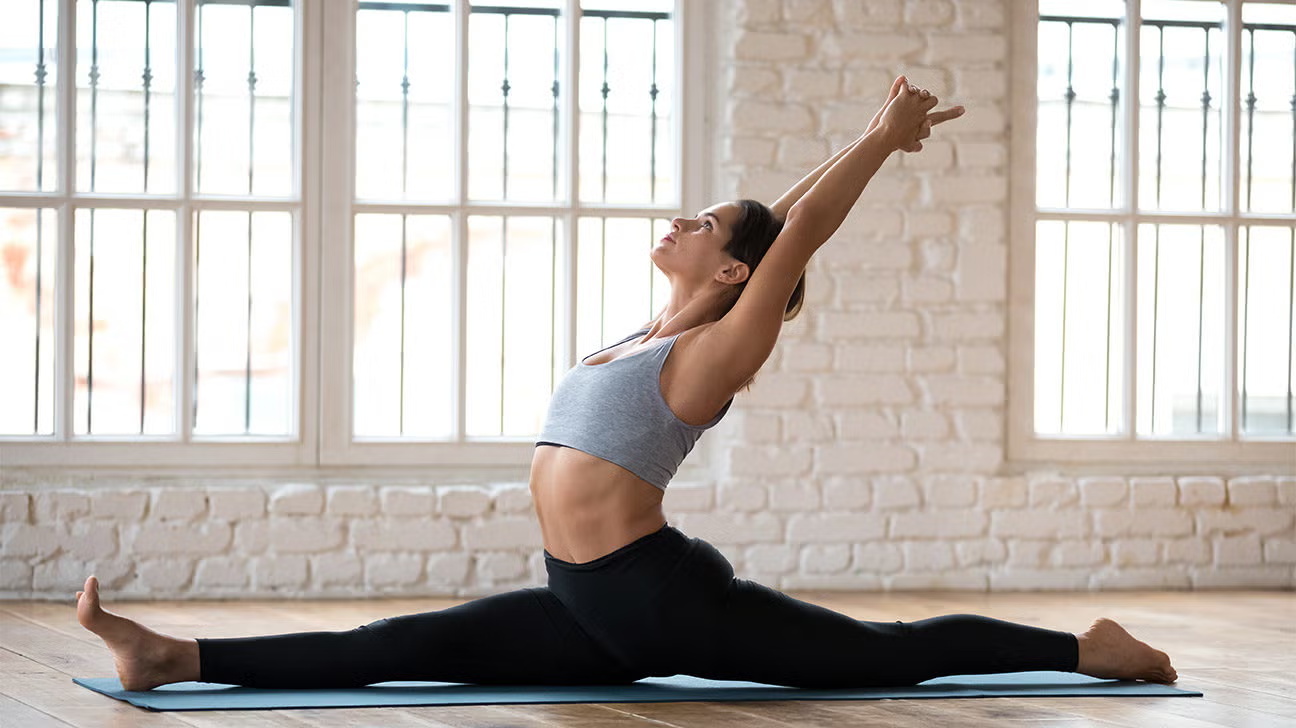
Step 4 — Controlled Descent into the Full Front Split
Goal: Put strength, mobility, and alignment together to descend safely.
Stepwise approach
- Warm-up + active mobility (5–8 min).
- Perform end-range strength set (ASLR or isometric holds).
- Use assisted split to reach a depth you can control for 30–60s.
- Attempt a controlled descent: 3–4 attempts per session — 3s lowering, 1–2s hold (or longer if comfortable), 3s return. Stop if sharp pain occurs.
Pelvic & hip positioning cues
- “Hips square to the front, imagine pulling the front hip back and the rear hip forward.”
- Slight posterior tilt of the pelvis to protect the low back.
- Keep the torso upright (or a slight forward fold on front-leg-dominant splits) depending on your flexibility.
Common form mistakes to monitor
- Torso leaning dramatically to one side — indicates hip rotation/asymmetry.
- Over-arched low back — indicates letting the pelvis tilt anteriorly; tuck slightly.
- Front knee bending — compensate with strength work and hamstring control.
Key Stretches & Drills for Faster Progress
- Kneeling hip flexor stretch — 30–60s, 2–3 sets. Emphasize glute squeeze and pelvic tuck.
- Half split (Ardha Hanumanasana) — active and passive versions: 20–40s holds, 2–3 sets.
- PNF / Contract-Relax technique — 5–6s gentle contraction of the target muscle (e.g., hamstrings) against resistance, then relax and passively go deeper for 10–20s. 2–3 repeats.
- Front-split pulses and holds — small controlled pulses (5–8) at near-max depth, or holds of 20–60s. Use these sparingly (once per session) and only when fully warmed up.
How Often to Train the Front Split
Frequency vs intensity
- Beginner: 3 sessions per week (shorter, focused sessions).
- Intermediate: 4–6 sessions/week with varied intensity (some days mobility, some days strength).
- Intensity rule: If you do an intense loaded or maximal depth session, follow with lower-intensity recovery sessions for 24–48 hours.
Weekly progression example (intermediate)
- Mon: Mobility + active strength (30–40 min)
- Tue: Light active mobility or rest
- Wed: Assisted split holds + PNF (30–45 min)
- Thu: Strength (single-leg RDLs, glute work) + mobility
- Fri: Controlled descent attempts + light holds
- Weekend: 1 easy mobility session or rest
Signs you’re pushing too hard
- Persistent sharp tendon pain, increased joint swelling, loss of sleep due to soreness, or a sudden drop in performance. Back off and prioritize recovery or seek professional help.
Common Mistakes to Avoid
- Forcing range too quickly — causes microtrauma.
- Ignoring the rear-leg hip flexor — it often limits split depth.
- Stretching without strengthening — leads to unstable gains.
- Training through sharp pain — pain is a warning; modify.
Supporting Habits That Improve Front Splits
- Strength for hips & core: glute bridges, split squats, RDLs, loaded step-ups. 2×/week.
- Recovery: 7–9 hours sleep, good hydration, protein for tissue repair.
- Mobility-friendly daily habits: break up sitting every 30–60 minutes, use standing desk, perform quick hip flexor openers midday.
Tracking Progress & Staying Motivated
What to measure
- Distance from pelvis/front leg to floor (use a block and measure height over weeks).
- Photo or video (same angle, same lighting) weekly.
- Hold time at a given depth (e.g., 30s → 60s).
- Active vs passive range differences.
Breaking plateaus
- Change stimulus (more isometrics, added eccentrics, or increased frequency).
- Focus 2–4 weeks on active strength if you’re active-limited.
- Use micro-progressions: 1 cm or 5–10s more hold per week.
Motivation hacks
- Small, consistent wins (log them), train with a buddy, set non-depth goals (control, symmetry).
Who Should (and Shouldn’t) Train Front Splits
Good candidates: most healthy adults, dancers, martial artists, athletes.
Be cautious / consult a professional if: history of hip/knee/lower-back surgery, current sharp joint pain, pregnancy (modify). Older adults can progress but should prioritise slower builds and more frequent recovery.
Conclusion
Why patience and smart progression lead to safe, lasting front splits
Front splits are a tissue-and-nervous-system skill, not a quick feat of will. Muscles, tendons and fascia adapt slowly, and your nervous system will protect you until it learns the new range is safe. Rushing depth by forcing passive stretches repeatedly creates micro-damage, increases pain, and almost always stalls progress. By contrast, a patient, progressive approach—slowly increasing range, adding active strength in the end range, and respecting recovery—re-teaches the nervous system and lets connective tissue remodel without injury. Over months, those small, consistent gains add up into a robust, controllable split that lasts.
Final tips for making front-split flexibility a long-term skill
- Prioritise quality over depth. Always choose clean alignment and control over reaching the floor. Depth without control is unstable and temporary.
- Mix mobility + strength. Pair end-range strength (isometrics, active straight-leg raises, eccentrics) with progressive stretches. Strength makes your new range usable.
- Warm up every session. A 6–8 minute targeted warm-up increases tissue temperature and nervous-system readiness—this is non-negotiable for consistent progress.
- Use micro progressions. Add 1–2 cm, 5–10 seconds of hold time, or one extra rep per week. Small, measurable steps beat big, risky jumps.
- Breathe and relax into the range. Diaphragmatic breathing and “exhale-to-sink” cues reduce guarding and let you access deeper, safer length.
- Watch for pain signals. Sharp, joint, or nerve pain means back off. Distinguish challenging tension from harmful pain. When in doubt, regress and seek professional assessment.
- Rotate intensity and recover. Alternate harder sessions (max depth, loaded eccentrics) with lighter mobility or rest days. Tendons and fascia need recovery time.
- Track progress objectively. Use photos, the block-height method, or timed holds—these small records keep you honest and motivated.
- Fix daily habits. Reduce prolonged sitting, break up desk time, and add short mobility checks during the day to keep hips receptive to training.
- Make it sustainable. Two to five focused sessions per week that you can maintain for months is far more effective than a short, intense sprint.